 Starting on the rear wheel
To prepare any drop off, or to climb small steps, but ultimately, for jumping from one beam to another, you'll need to hop using more the crank than just your legs. The "pedal hop", or "pedal kick", is the solution. That's also a starter for plenty of very cool climbing moves. Here is how you cross a gap.
Excellent for crossing all sorts of gap
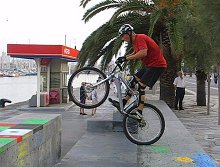
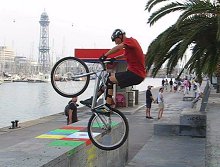
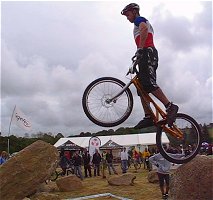
1° Start balancing on the back wheel, near the edge to leave, but not right onto it.
2° Lower slightly the front to get extra torque and pulling margin, compress the tyre.
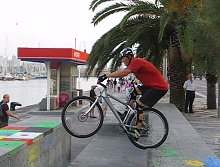
3° Thrust yourself forward while standing on the good pedal before the pedal kick.
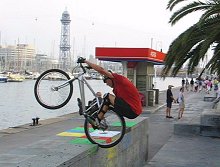
4° Finish your impulse with a strong pedal kick (a fast 1/4 turn) that sends you off the edge, in full extension.
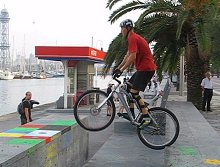
5° Time to fold back. Pull the bike upwards in front of you while tucking up the knees to let the bike go up.
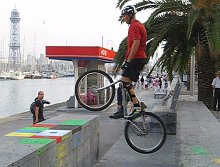
6° Touch down with full brakes on, and crouch back on the bike to damp the impact and avoid a pinch flat.
Once landed, try to keep your balance above the bike. At the beginning, it's quite common to bounce back, if your body is too much behind the seat. Start on any street kerb and practice. See the move in a slow-motion video and with a mod bike.
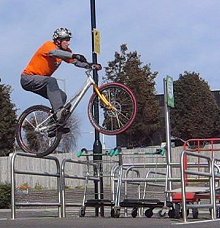
Massive rail to rail gap by Joe
(slow-motion video).
You can clearly see the extension in the videos. Also, to get extra distance, you must move the body forward just before the pedal kick. That brings your center of gravity further above the gap, before you even pedal kick. This makes the gap shorter than if you started from a balanced position above the rear hub. Hip motion is key.
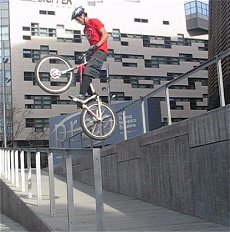
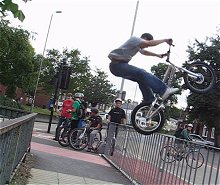
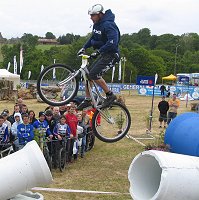
Pedal kick / drop off to a rail
More power in the move
Also, by lowering the front wheel, moving forward gives you more torque and power for the pedal kick,
and compensates for the vertical inclination you'll get from it. Then you don't end up so much on the rear when you land.
You can even boost your kick with a small bouncing effect on the rear wheel just before lowering the front wheel.
You can enhance that effect further by bouncing precisely on the edge you leave (when lowering the front wheel).
You can also optimise your reach by taking off slightly sideways, with the bike making an angle of about 20° with the gap instead of facing it
(your bad foot towards the gap) and with a little inclination of the frame inwards the gap.
That will allow you to kick-in more power and for longer, until you are in full extension on your driving pedal.
 All the clips in one video
(or right-click to download the .wmv file)
Pre-load your pedal kick to spring up.

Wing uses a bouncing effect
to boost the pedal hop.
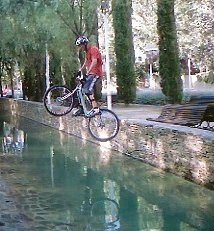
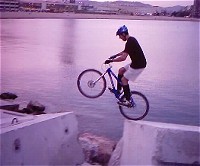
pedal kick over a gap of water
At a Pro level: the move in its perfection
The key is to pre-load well, using the bounce-back effect of the rear tyre to the maximum, right on the edge with the front wheel lowered,
and tucking the knees to bring the bike in front of you, increasing the reach of the rear wheel for landing further. Check out these perfect moves.
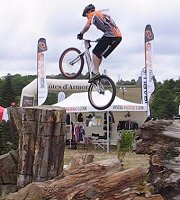
Full extension during the pedal kick
Tuck to bring the bike to the other side
Optimum starting position for a kick: on a theoretical basis.
Now you can pedal kick, make the most of it.
A correct rear wheel position can makes all the difference between a face-plant and a nice powerful gap transition.
If you start from a flat edge, you have quite some margin and the wheel won't get stuck. But on any sharp edge,
say on a pointy rock or from a rail, the rear hub should always be right above or beyond the edge (on the gap side), like shown on
the pictures b and c. Never start with your hub behind the highest point of the edge (picture a), unless you want to put yourself in
desperate crash situations. In the optimum case (picture b), you position the rear hub vertically right above the edge (or above the highest bit)
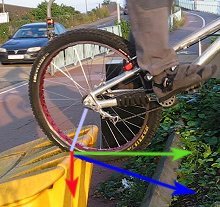
you'll have the most kick back from the rail. The reaction force from the rail onto the wheel (the blue arrow) is completely horizontal and there
is no vertical reaction (we are talking about the rotation and torque of the wheel, not your overall jump impulse).
Rear wheel position on the edge of a gap, when ready for the kick.
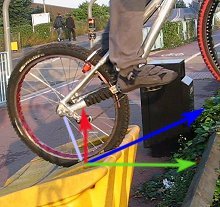
a: The rear hub is behind the peak of the edge, the wheel can get stuck behind when you kick. The vertical reaction upwards (red arrow) will flick the rear wheel up (face-plant guaranteed in most cases, this is no fun!)
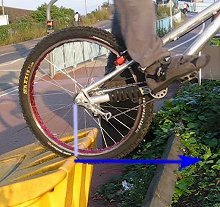
b: The rear hub is right above the highest point of the edge, the wheel will provide the maximum torque horizontally, for an optimum gap distance. There is no vertical reaction, all your energy goes into the horizontal move.
c: The rear hub is a bit behind the edge on the gap side, the rear wheel rolls down and this drags the bike down while you try to tuck for the gap crossing. The downward reaction (red arrow) is lost energy and makes your jump ineficient.
If you kick in the pedal while the hub has already passed beyond the highest point, then the reaction to the
wheel torque (the force that reacts from your kick into the wheel - blue arrow perpendicular to the radius of your wheel in light blue) can be split into an
horizontal (green) and a vertical (red) component. The vertical component is wasted energy downwards, that could have been useful for the horizontal gap.
Instead, it pushes your rear wheel down and makes it more difficult overall to lift the bike up. That's still better
than a face-plant start (picture a). Now, this is a good approach for drop-gaps. You can play on this roll-down effect
to kick your rear wheel directly towards the landing spot.
In the case of picture a, if you kick with the rear wheel positioned a tiny bit in front of the edge, the torque of
reaction of the edge to the torque of the wheel (blue arrow) will decompose in a vertical upward force (in red) and a horizontal reaction (in green).
That's ok if you keep your weight behind or above the rear hub, for a small re-adjustment hop. But if you are giving a strong pedal kick
to lurch forward over a gap, the upward reaction will flick the rear wheel up and send you over the bars. Effectively, the rear wheel is
stuck behind a small step, and that's the start of your face-plant.
Adjustment and pre-load hop when lowering the front wheel
Typically, when you are in perfect balance on the back wheel, on a rail or a pointy edge, the front wheel is fairly high up.
Now, when you lower the front wheel before the kick, this rolls the rear wheel down by about a foot
(with the hub coming behind the edge). That's why in most cases, the
compression hop before the kick is also a repositioning hop, bringing the rear wheel back again in a good position right before the kick.
If you want to avoid a re-adjustment hop, then start in balance with the rear hub just a bit behind the edge, so that when you lower the front wheel
you end up with the hub exactly at the vertical to the edge (picture b), ready for the perfect kick. Try to focus on this and you'll notice a huge difference
in your kicks.

Looking for any trials specific components?
Check out the Manufacturers' listing on the Bikes page.
You'll find all the major MTB and biketrial names and online shops:
(Ashton, Czar, Echo, Gu, Inpulse, Koxx, Monty, Onza,
Ozonys, Rockman, Try-All, TMS, Viz, Zoo, etc...)
Sign the guestbook or email your comments
Copyright © 1998-2013: TrashZen


